

XO Key Takeaways:
- Confirm your unit needs replacing—persistent leaks, grinding noises, or a motor that hums but won’t spin are key signs.
- Always disconnect power and plumbing before starting to ensure safety.
- Gather basic tools like a wrench, screwdriver, bucket, and plumber’s putty before beginning.
- Install the new flange, mount, and disposal securely, then test for leaks and proper operation.
- Hiring a plumber costs $200–$500 but doing it yourself cuts costs to about $100–$250.
No one wants to hear the low growl of a failing garbage disposal after dinner. It hums, sputters, and then stops. A small leak forms beneath the sink and creeps toward your beautiful cabinetry. Most people call a plumber, but if you enjoy DIY projects, learning how to replace a garbage disposal is easier than it looks.
With basic tools and a simple process, you can complete your own garbage disposal replacement safely and efficiently. Let’s walk you through how to do exactly that, no panic and no plumber needed.
Step 1: How Do You Know When It’s Time for Garbage Disposal Replacement?
Before you grab your toolbox, confirm that your disposal actually needs replacing. Sometimes, a simple reset or jam clearing can revive it. But if you’re facing any of these issues below, a garbage disposal replacement is the right call:
- Persistent leaks even after tightening fittings
- Loud grinding noises from worn bearings or impellers
- Frequent clogging or sluggish draining
- A motor that hums but doesn’t spin
- Foul odors that cleaning no longer removes
If any of these sounds familiar, then yes—you’re ready for a fix that restores order, quiet, and the risk of bigger repairs needed later.
Step 2: Gather Tools Needed to Replace Your Garbage Disposal Units
Getting your tools ready first saves you time, keeps the job organized, and will help you with any unexpected mid-fix surprises. You’ll need:
- Adjustable wrench or socket set
- Screwdriver set (Phillips and flathead)
- Bucket or shallow pan (to catch any residual water)
- Utility knife or putty knife
- Wire connections (if wiring is required)
- Towel or small mat (to protect cabinet and flooring)
XO Tip: Clear your workspace before you begin, too. High-end kitchens often have tight cabinetry; protecting finishes and giving yourself room makes DIY tasks easier.
Step 3: Disconnect Power and Plumbing
Always disconnect the power supply before working on electrical components.
- Unplug the disposal from the outlet under your sink.
- If it is hardwired, turn off the power at the circuit breaker and verify the power is off.
- Place your container or bucket under the P-trap. (a U-shaped section of pipe under your sink that, with a connected horizontal pipe, resembles the letter ‘P’ when looked at from the side.) Next, loosen the slip nuts (a large threaded plastic or metal ring that holds the drainpipes together) to disconnect the drainpipe.
- If your disposal connects to a dishwasher, remove the discharge hose as well.
Step 4: Remove the Old Unit
Hold the bottom of the old disposal firmly and rotate the mounting ring counterclockwise (the metal ring that locks the disposal to the sink drain. Most units drop free with a little turn and support. If your model uses a snap ring or mounting bracket, simply remove it according to the manufacturer’s instructions.
Once removed, scrap away any old plumber’s putty or residue from the sink flange. This step is crucial for achieving a watertight seal when installing the new disposal.
Step 5: Install the New Flange and Mounting Assembly
Every garbage disposal replacement starts from the top—literally! Apply a ring of plumber’s putty around the drain opening, then press the new sink flange firmly in place. From beneath the sink, assemble the mounting ring and gasket per the new model’s instructions.
Tighten everything evenly, ensuring a snug, secure fit. Wipe away any excess putty that squeezes out so the flange sits flat, seals correctly, and will keep water from leaking under the sink.
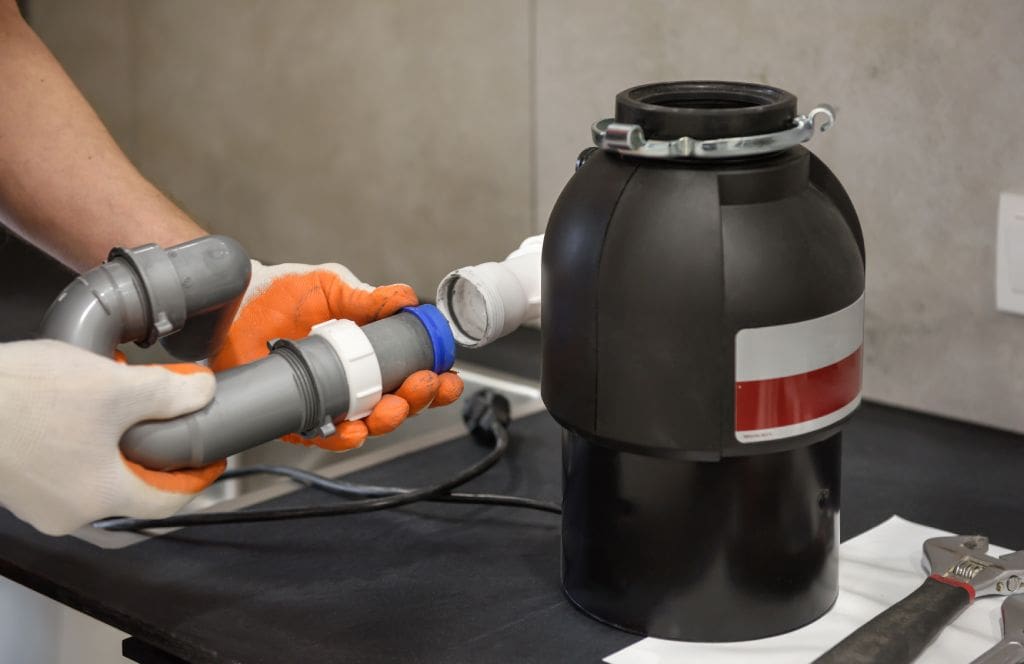
Step 6: Connect the New Disposal
Now comes the most rewarding part! It’s time to install your new unit.
- If your model does not come prewired, connect the electrical wires following the color codes. In general, black to black (hot), white to white (neutral) and green to the ground screw (a small screw inside the wiring compartment, near the bottom of the disposal where the power cable connects.) Lift the new disposal into position and align it with the mounting assembly. Rotate the locking ring until it clicks into place.
- Reattach the discharge pipe and, if you have one, dishwasher hose.
- Tighten all connections with your wrench. Hand-tight is fine to start, then give each a final quarter-turn to prevent leaks.
Aligning fittings cleanly helps long-term reliability and eliminates unwanted vibrations or noise.
Step 7: Test for Leaks and Proper Function
Before the tools are all put away and celebration begins, make sure to run a quick test.
- Restore power at the circuit breaker or plug in your disposal.
- Fill the sink with water and let it drain through the system while checking for any leaks or droplets beneath the sink.
- Turn on the disposal and listen. A well-installed unit runs quietly and smoothly.
If everything looks and sounds good, congratulations! You’ve just mastered replacing garbage disposal like a pro.
How Much Does Garbage Disposal Replacement Cost with a Plumber?
Pricing varies state-to-state, but the average garbage disposal replacement cost can range from $200-$500 when hiring a plumber and depends entirely on the complexity of the replacement. Doing yourself reduces the price to that of the new unit itself, which is often between $100-$250 for high-quality models.
Taking the DIY route can save you money while gaining the satisfaction of doing it yourself and knowing the installation meets your own high standards.
The Finishing Touch: Confidence in Every Connection
Learning how to replace a garbage disposal teaches you how to handle small repairs on your own and avoid the cost or delay of a service call.
At XO Appliance, we believe homeowners should have both luxury and control. Every product we design has a single goal: to help you get the lasting results that look and perform like a professional kitchen installation.
Experience the standard in your home kitchen. Browse online or find your nearest XO dealer to see what precision, care, and luxury feels like.